To make text a link: <a href="url"> Text </a> Ex) Video/Image Credit: <a href="http://www.greenday.com/"> Green Day </a>
Italicize text: <i>text</i>
Block quote: <blockquote>text</blockquote>
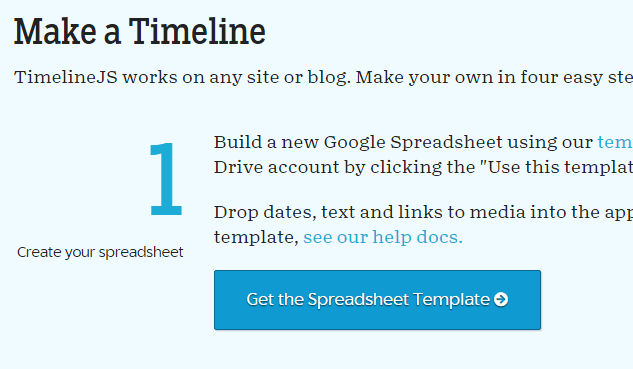
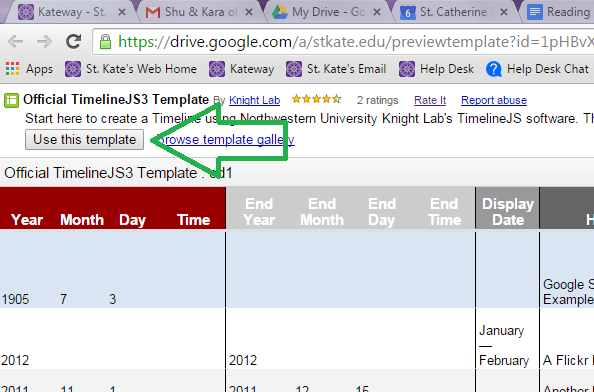
Field |
Tips |
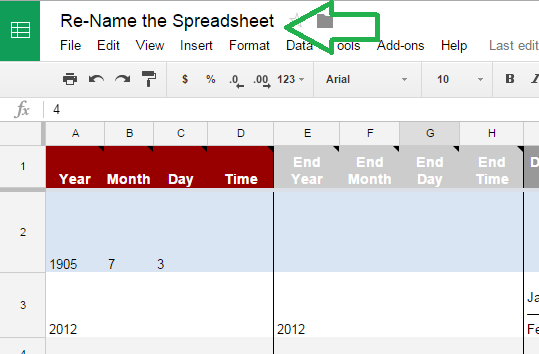
Date |
Be as specific as you need to. End dates are optional. Use negative numbers for BCE |
Display Date |
Use if you want the date to display differently than the default (Example: circa 1900) |
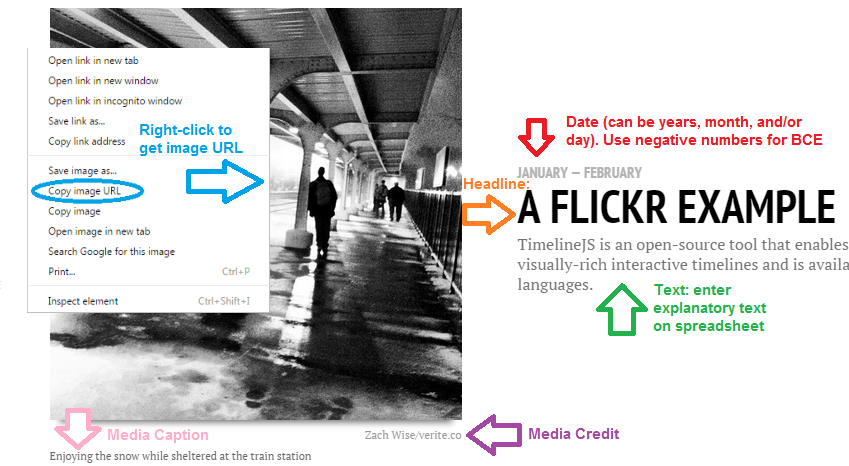
Headline |
Write a headline that is brief, descriptive, & attentional-grabbing |
Text |
Being concise is key here |
Media |
Here is where you put the image/video/google map/etc url. Right-click and "add image location" or "add image url" to get correct url for images. Do not link to obviously infringing content. Use this field for quotes as well. Put the tags <blockquote> & </blockquote> around the quote you want to highlight. This is a good option for calling out important ideas/quotes or for adding visual appeal to content that doesn't easily associate with an image. |
Media Credit |
Always give attribution for your media! See the "Citing non-traditional sources" link on the "citing" tab of this guide for help citing images, video, art, etc. |
Media Caption |
Use to help reader interpret image and/or connect it to the text |
Type |
Select title to create a title slide |
Background |
Paste an image url or color hex code to change the background of the slide. |


©2024 St. Catherine University Library, St. Paul, Minnesota, USA


